

How to Paint a Pumpkin Beginner Gouache & Watercolor Step by Step
Learn how to paint a pumpkin using gouache for beginners who need a step by step tutorial.
Painting a pumpkin doesn’t have to be rocket science. In this short tutorial, we will cover the steps from start to finish on how to matriculate the plump shape of an orange pumpkin.
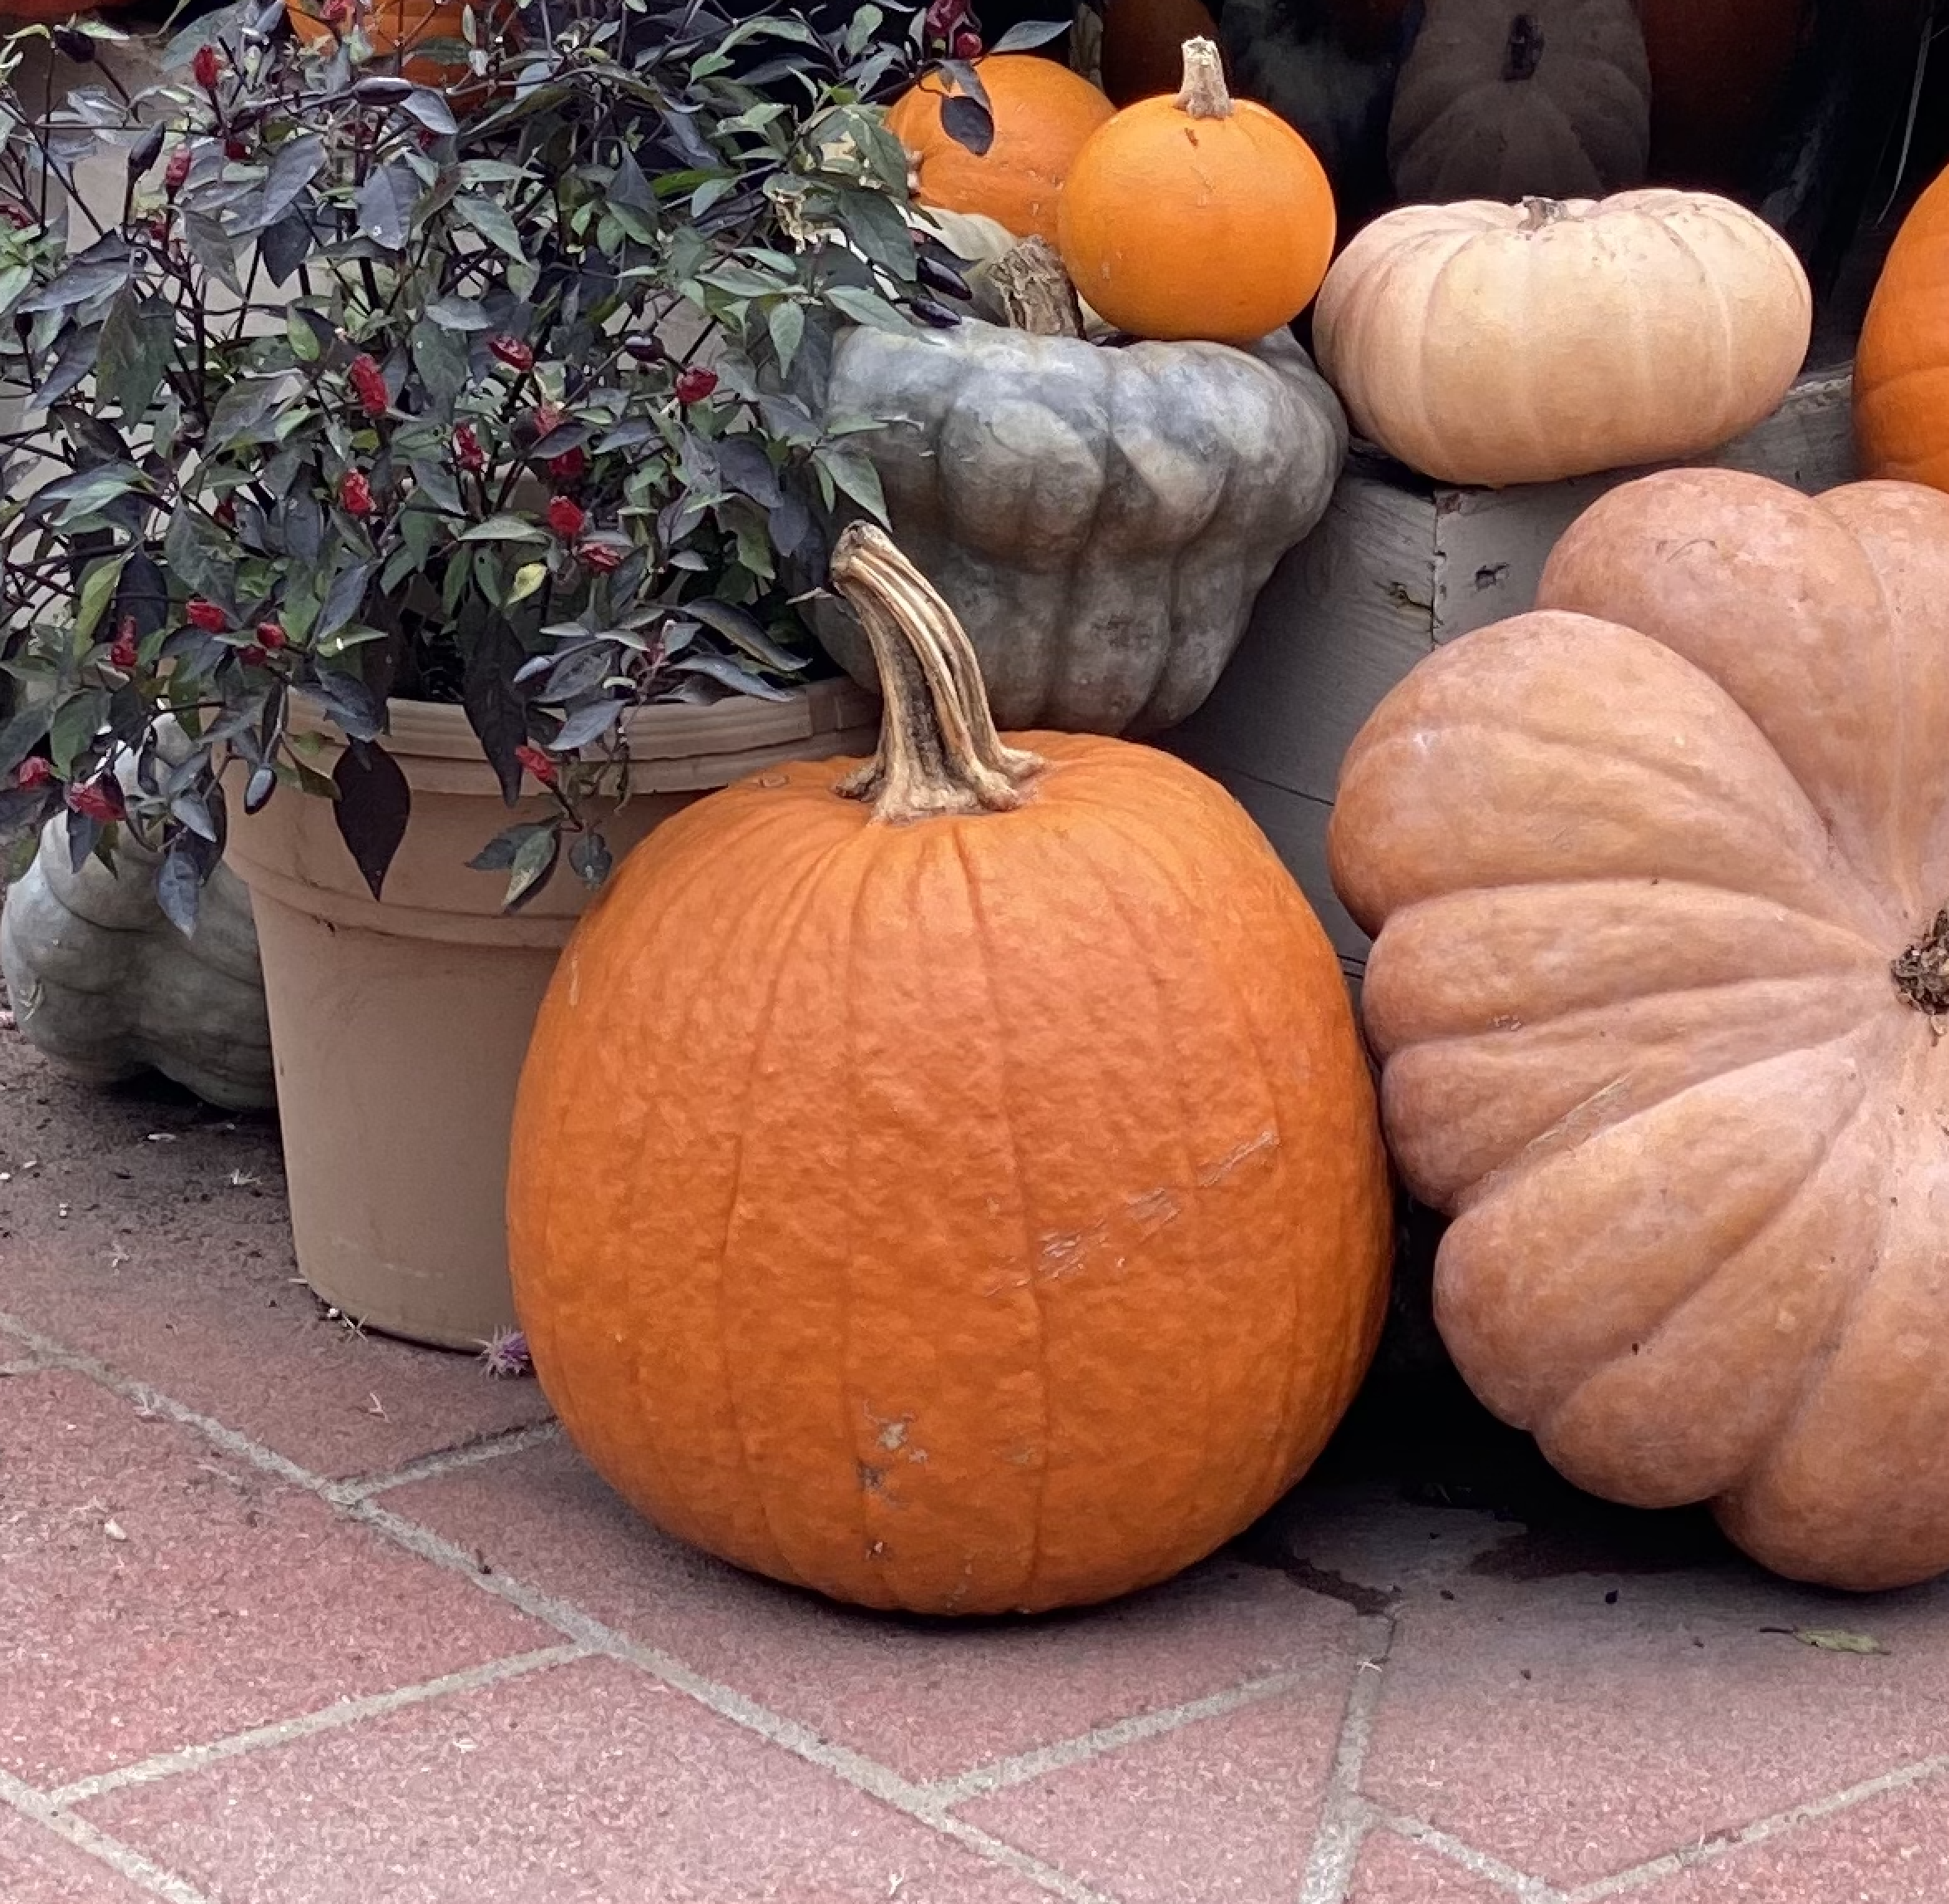
In this tutorial, I’m using the Himi Jelly Gouache painting set from Amazon which is around $30. I’m also using a subject photo I took at the Sherman Library. You’re welcome to download it and follow along.
Right click to download and save the image.
Step 1 for Painting a Pumpkin is begin with a sketch
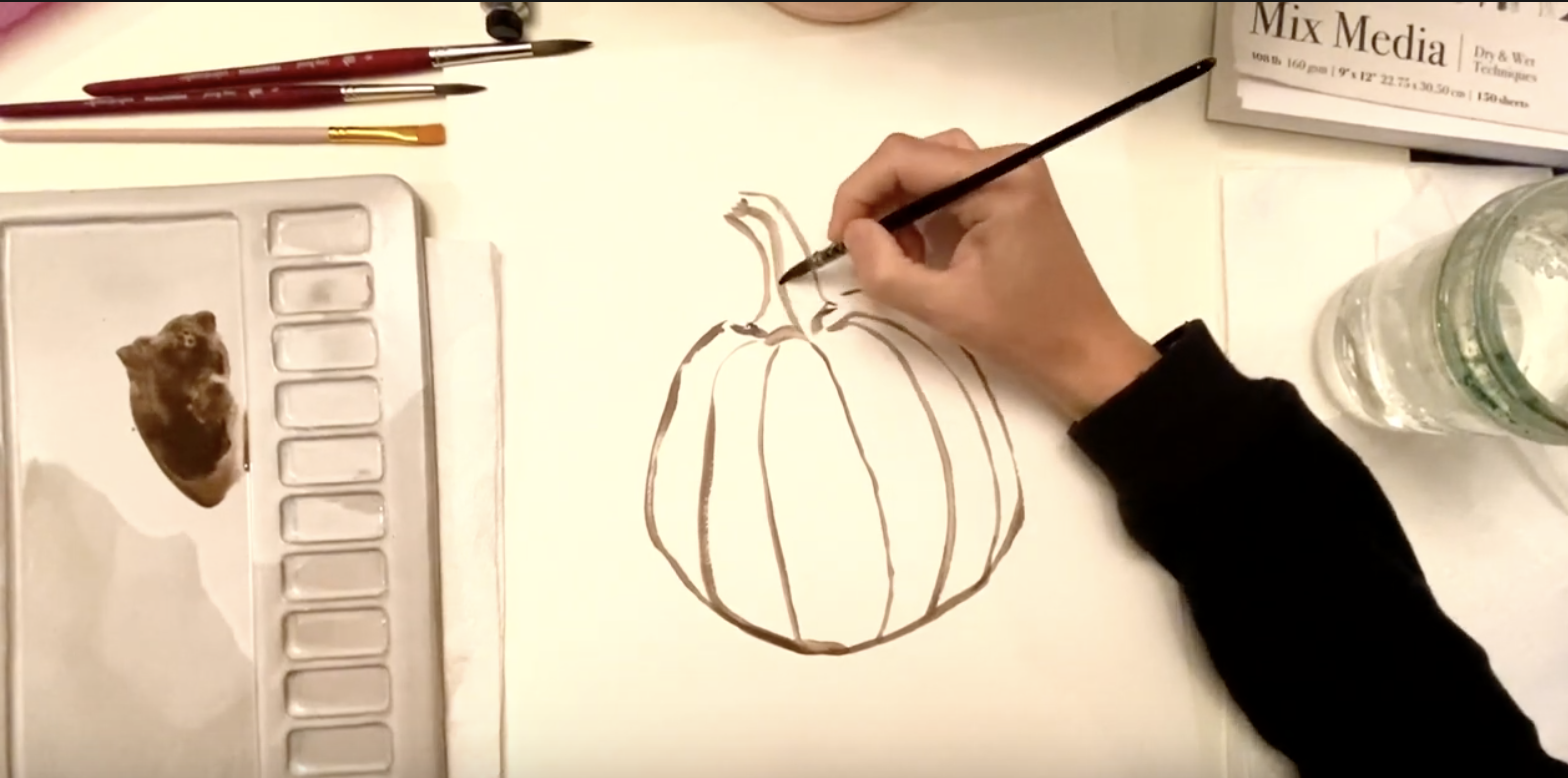
I begin the process of painting the pumpkin by painting the shape of the pumpkin with burnt umber. This allows me to see the areas I’m going to be painting inside.
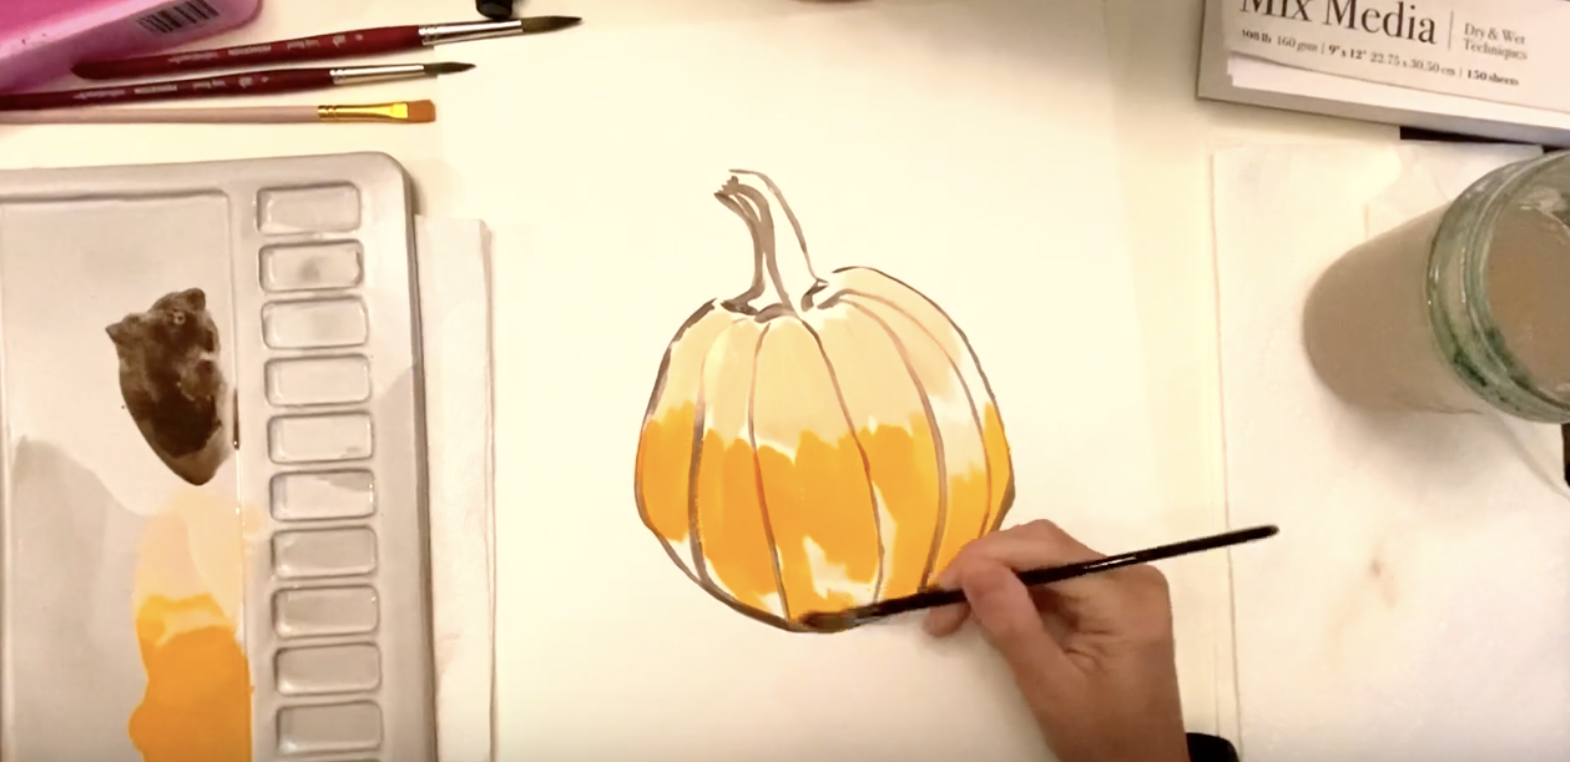
Step 2: Start to apply color to the pumpkin
The first layer of color on the pumpkin is a flesh tone called “nude” that comes premixed with the Himi Gouache set. I begin by mixing white into each color I will be using to paint the pumpkin. I apply orange to the pumpkin to establish a vibrant middle value.
Step 3: Establish a darker value in the painting
I use my outline color, the burnt umber color, as my darker value in the painting. I begin adding darker values to the bottom where there is shadow and less light. Establishing your light source in the picture will help you to know where you should have darker colors and where you should have lighter colors on the pumpkin.
Step 4: Add more middle values to the painting
Here is when I begin to widen the range of values in the painting. I begin mixing the orange with brown for a darker middle value, and my orange with white to get a lighter value.
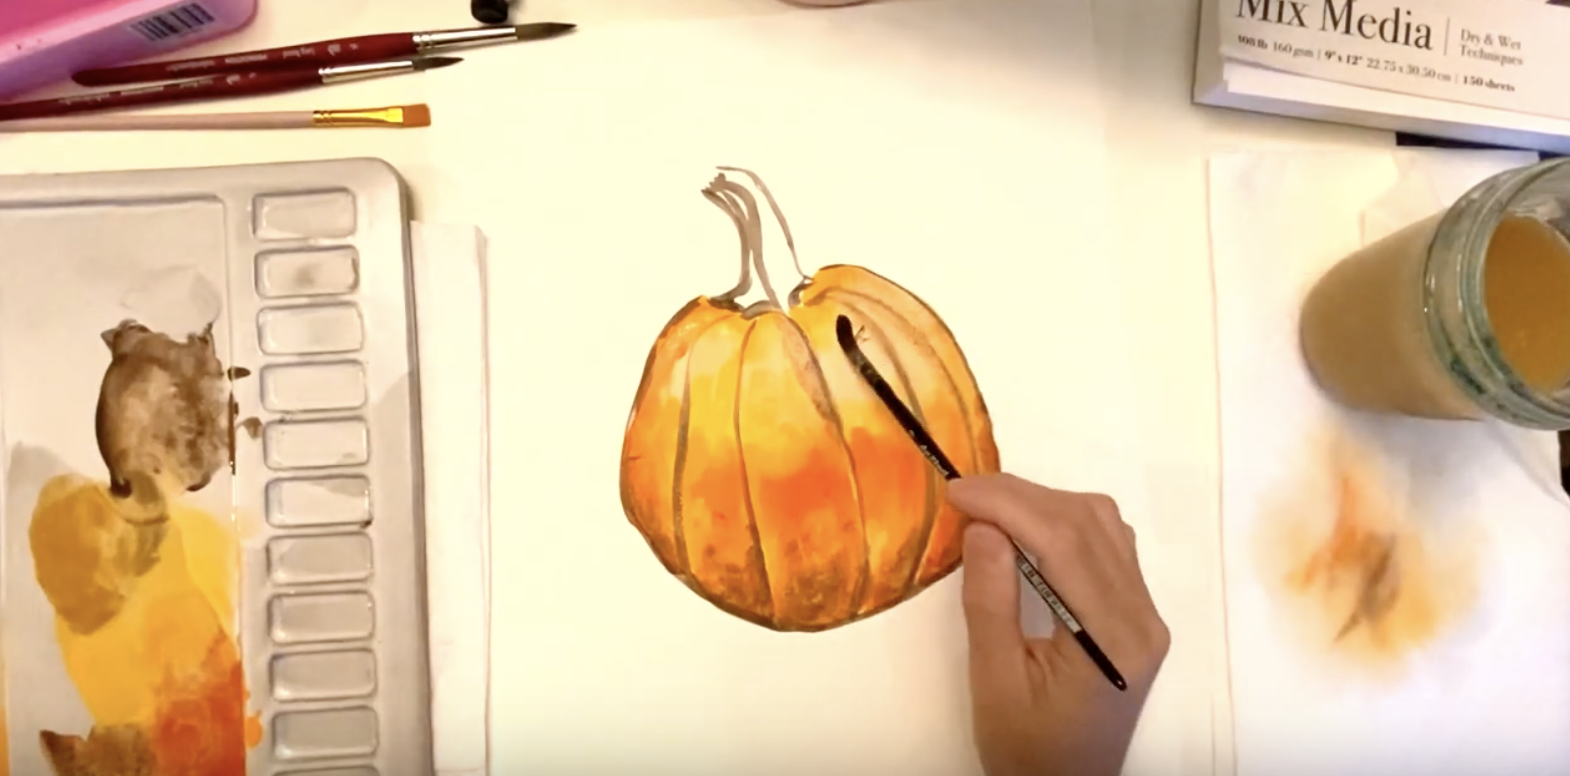
I continue to blend using the tip of the brush and gentle blending circles. These circles allow you to gently move the paint in a way that does not pull it off the paper. I mix deep red with orange to get a darker orange color for the round and full part of the pumpkin.
Step 5: Add more lighter values back into the painting
I add earth yellow and yellow ocher into the lighter areas of the painting and create variations of yellows using white. I also blend the lighter color over the harsh lines where the light is hitting the pumpkin on the right side. This adds a touch of realism to the pumpkin. If you observe the pumpkin in the resource image, you’ll notice that the right side of the pumpkin is lighter as it’s closer to the light source.
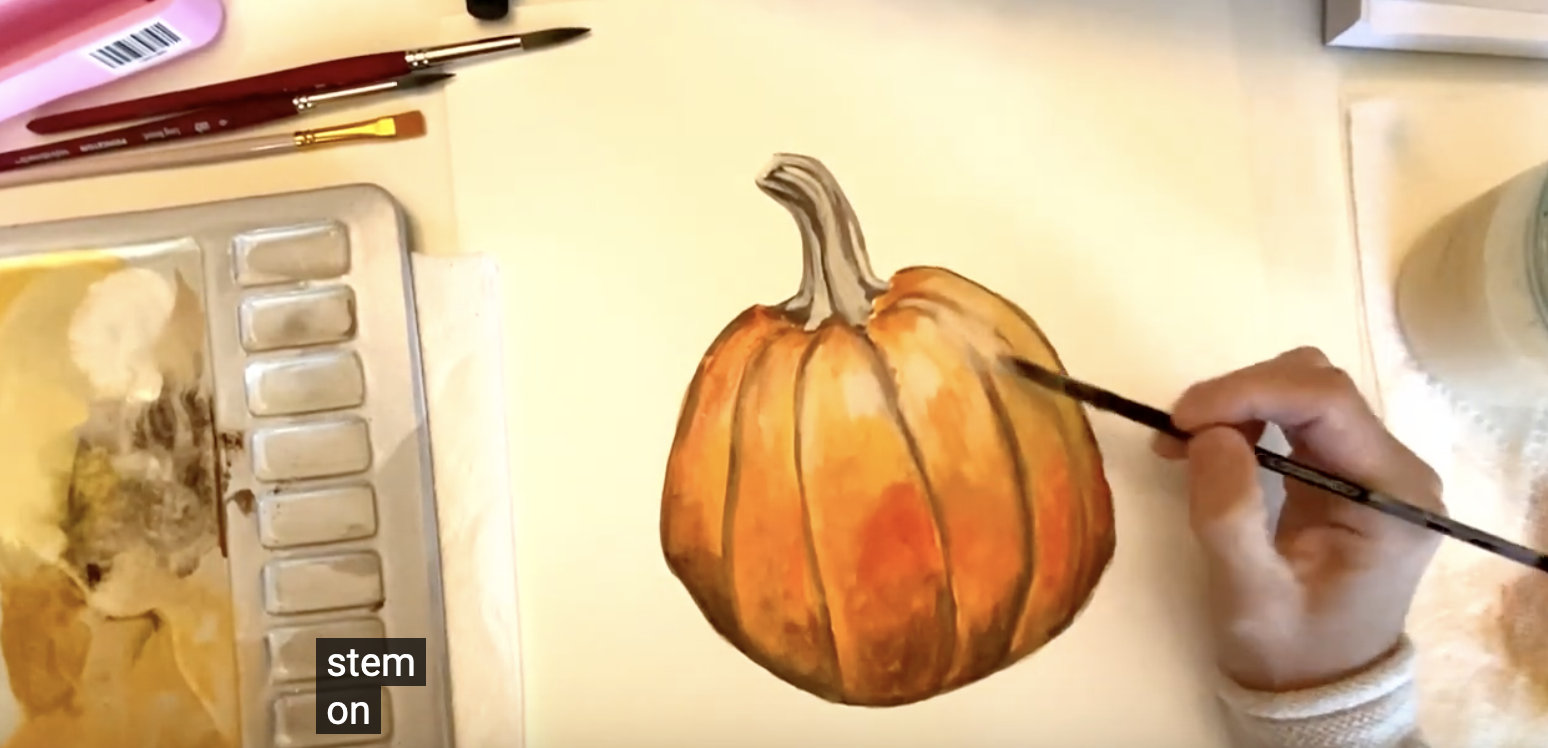
Step 6: Adding color to the step and building up details
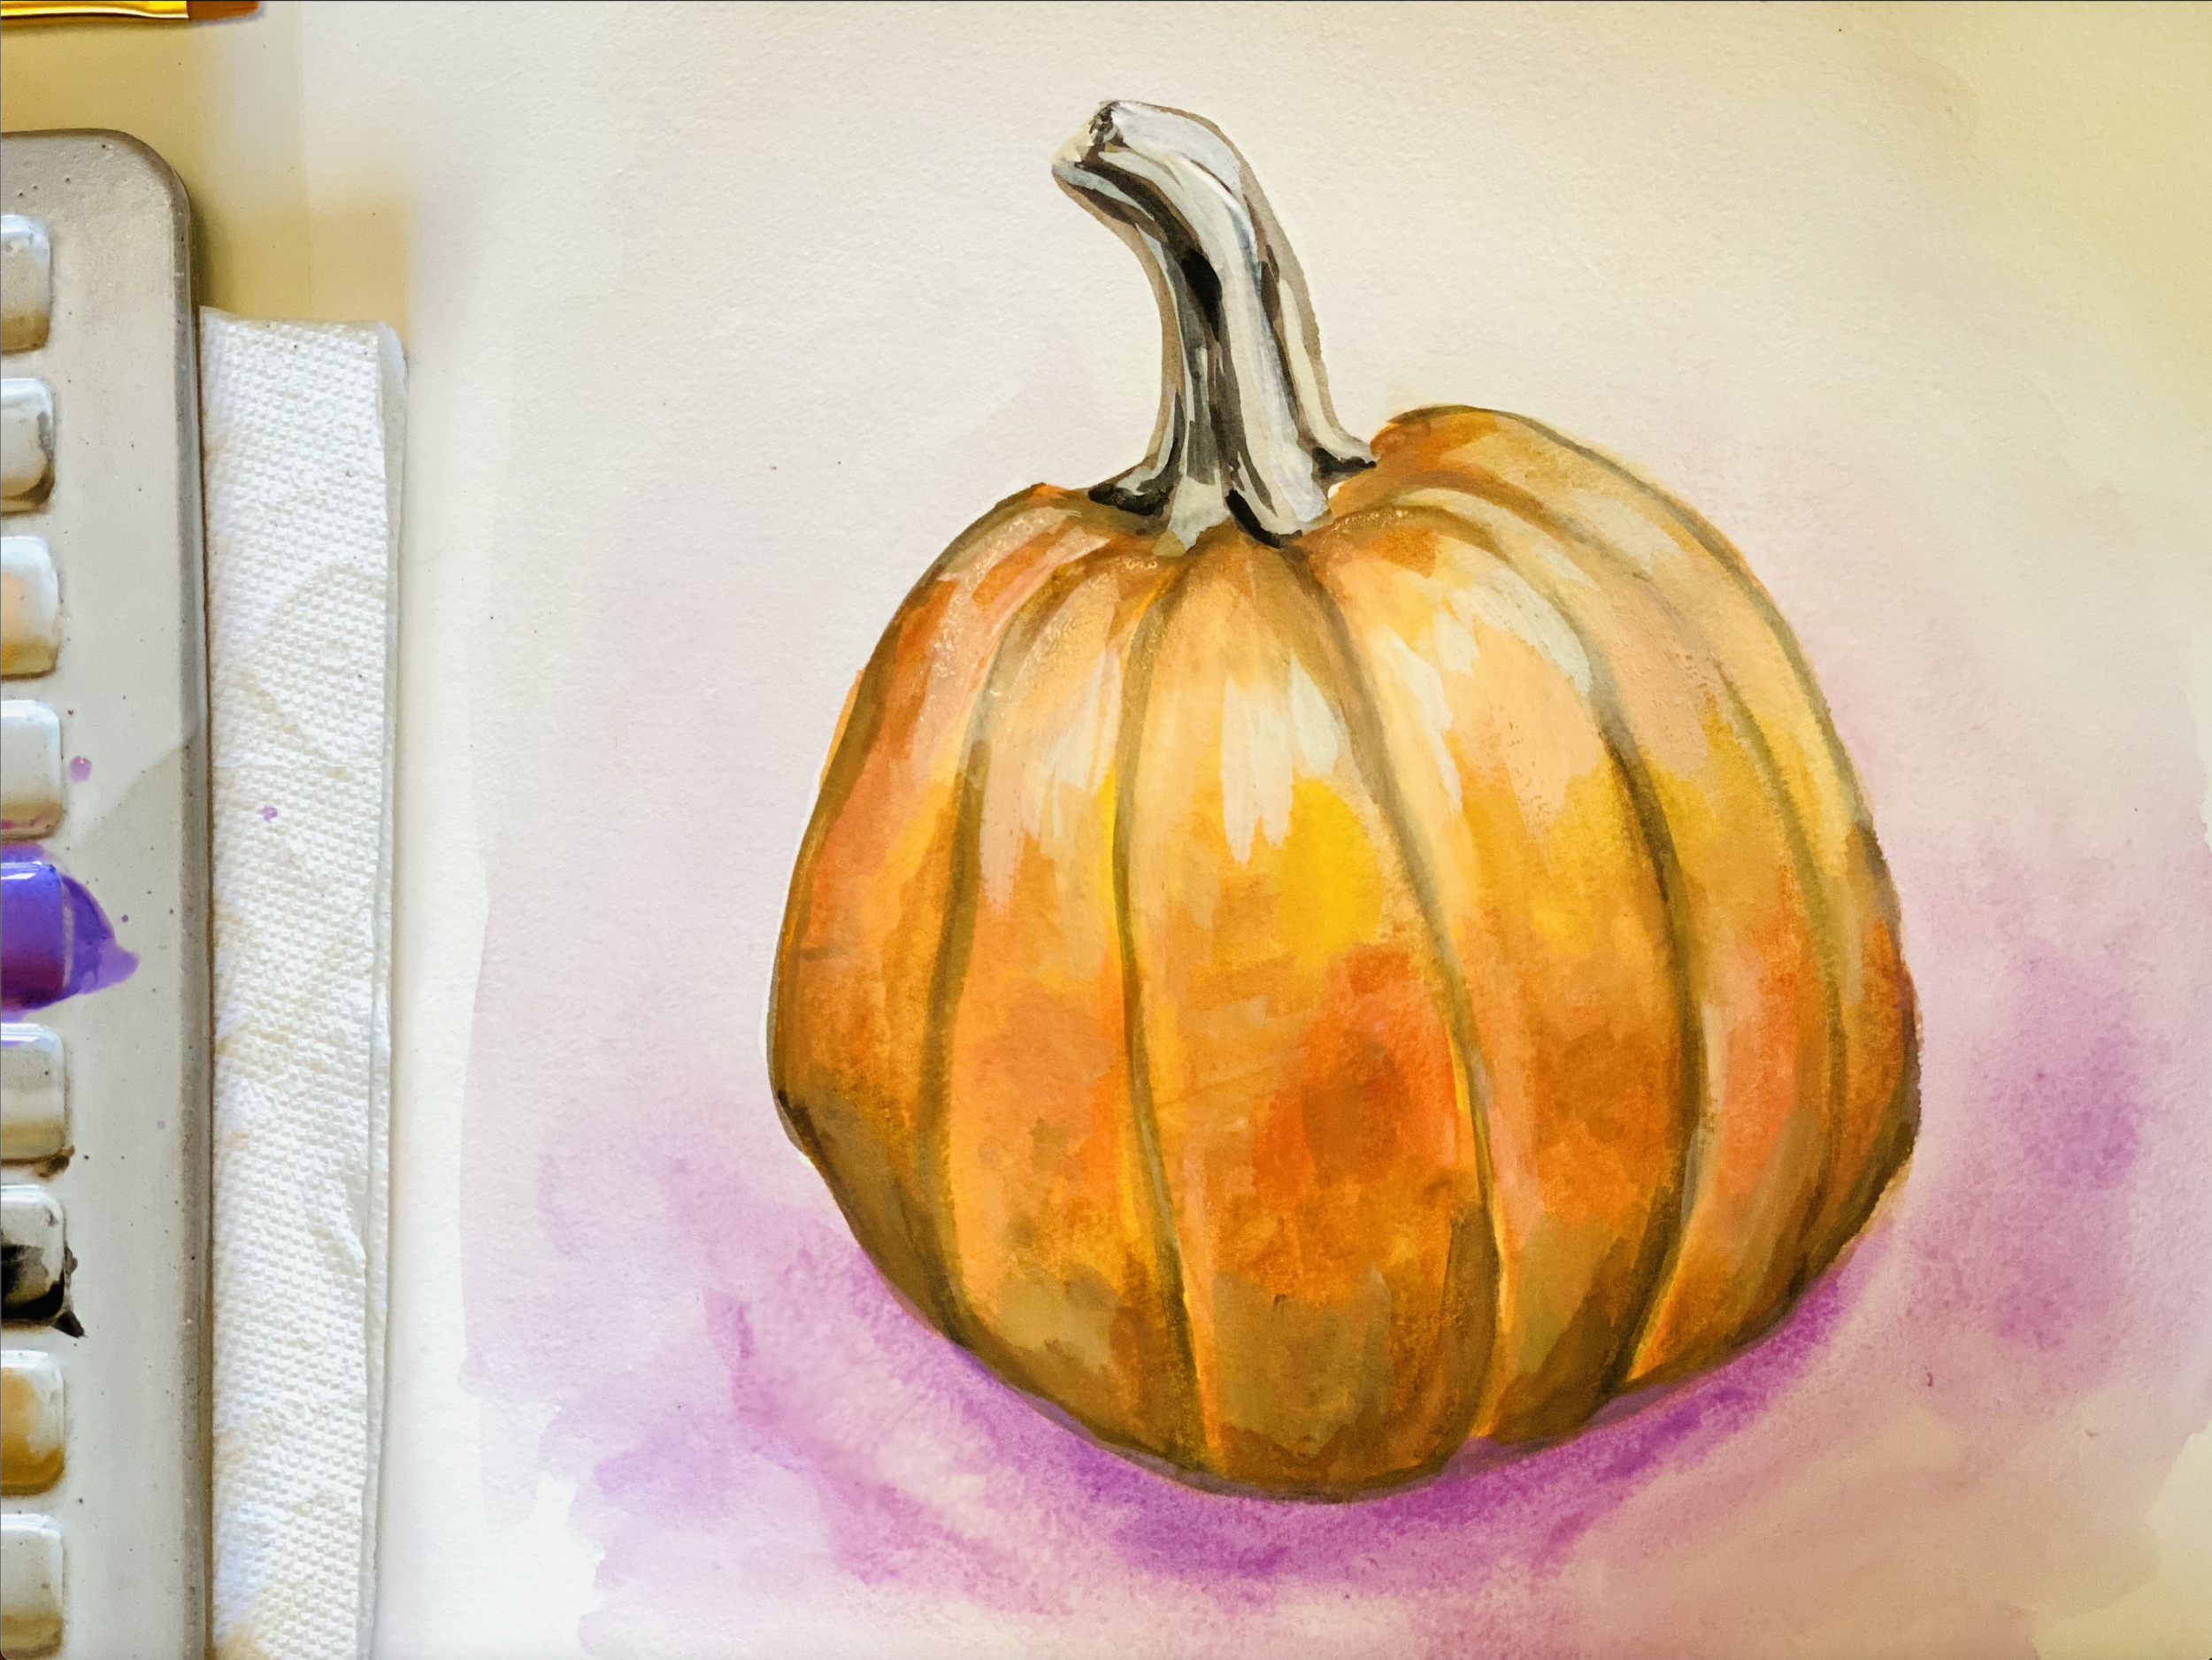
In this final part of painting a pumpkin with gouache I use the burnt umber with white to create a neutral brownish grey color for the stem. Then I add details with black. This gives the stem an organic look and stays close to the original color on the gourd.

I wrap up the painting by blending the base layers of the painting with a little bit of water in my brush while doing gentle circles. The trick is to just keep everything gentle and slow.
My final touches consisted of adding a purple background to the painting so that the pumpkin did not appear to be floating.

In case you would rather watch a video and paint along with me see see below.